Thanksgiving Charcuterie Cups: Easy Individual Appetizers
Affiliate disclosure: This article contains affiliate links. If you buy through them, we may earn a small commission at no extra cost to you. As an Amazon Associate I earn from qualifying purchases. Links go to Amazon search results for the product types we mention, not to specific products we have tested.
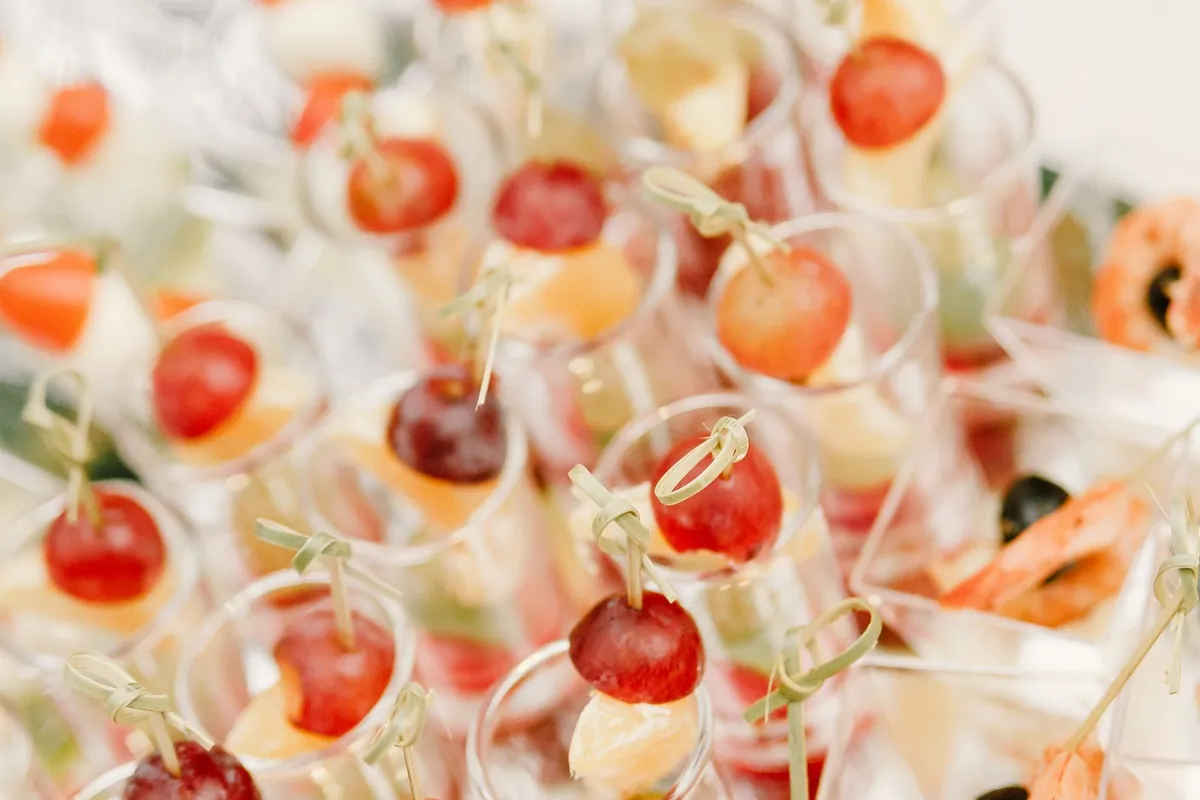
Charcuterie cups take everything people like about a cheese board and put it in a single portion guests can pick up and carry. Nobody has to hover over one board, there's no double-dipping, and the cups are easy to hand around a crowded kitchen while the turkey rests. They also solve the "how much do I put out?" problem: one cup per guest, plus a few spares. If you'd rather build one shared spread for a seated group, see our Thanksgiving charcuterie board ideas.
This guide covers how to make Thanksgiving charcuterie cups: which cups and picks work, eight fall filling combinations, an assembly-line method for a crowd, how far ahead you can make them and how to keep them safe on a long afternoon.
Why cups work so well on Thanksgiving
- Portion control before a big meal. A small cup takes the edge off hunger without filling anyone up before dinner.
- Less mess. Guests aren't reaching across each other, and crumbs stay in the cup.
- Easy to carry. Cups travel well to a Friendsgiving potluck in a lidded container, and they're easy to hold while mingling.
- Built-in dietary options. Make a few vegetarian or nut-free cups and label them, instead of trying to keep one shared board allergy-safe.
What you need
Cups. Clear cups show off the layers nicely.
- 9 to 12 oz clear plastic cups suit adult portions with a breadstick or skewer standing up.
- Small paper or kraft cups look rustic and work well for kids' cups.
- Small glass tumblers or jars look nicer at a seated party, but you'll need to wash them afterwards.
Search clear plastic party cups or kraft paper snack cups. If you're deciding between disposable and reusable, our guide to paper vs reusable party plates covers the trade-offs, and the same thinking applies to cups.
Skewers and picks. 6-inch bamboo skewers or cocktail picks hold cheese, meat and fruit together so the cup has height. Search bamboo cocktail picks.
Something for the bottom. A spoonful of dip, nuts or a folded napkin square gives the other items something to stand in.
How to layer a charcuterie cup
Build every cup in the same order, from bottom to top:
- Base: a spoonful of something that anchors the rest. Hummus, a thick dip or a small handful of nuts or pretzels. If you use a dip, put it in first so crackers stay out of it until guests are ready to eat.
- Tall items: one or two breadsticks, pretzel rods or a long rosemary cracker standing upright at the back.
- The skewer: threaded with cheese, a folded slice of salami and a grape or piece of fruit, angled toward the front.
- Fillers: crackers, dried fruit and vegetables tucked around the sides.
- Garnish: a small sprig of rosemary or thyme.
Aim for five to seven different items per cup. More than that and the cup gets crowded; fewer and it looks sparse.
8 Thanksgiving charcuterie cup ideas
1. Classic harvest cup
Aged cheddar cubes, folded salami, red grapes and a seeded cracker on a skewer, with a breadstick and a few roasted pecans in the bottom.
2. Apple and cheddar cup
Sharp cheddar, apple slices tossed in lemon water so they don't brown, a thin slice of prosciutto, a pretzel rod and a few dried cranberries.
3. Pear and blue cheese cup
Pear slices, small blue cheese crumbles in the bottom (they're too soft for a skewer), candied walnuts, a breadstick and a drizzle of honey just before serving.
4. "Cranberry sauce" cup
A spoonful of cranberry sauce or cranberry chutney in the base, cubes of brie or white cheddar, sliced roast turkey rolled onto a skewer and a few crackers. It tastes like the day in miniature.
5. Pumpkin-orange cup
Orange foods only: cheddar, dried apricots, clementine segments, orange bell pepper strips and carrot sticks, with a pretzel rod "stem." It's colorful and works for vegetarians.
6. Veggie cup with dip
Ranch or hummus in the bottom, then snap peas, cucumber spears, cherry tomatoes on a skewer, celery and a breadstick. Lighter before a heavy dinner.
7. Mediterranean-style cup
Marinated olives (drained well), mozzarella pearls, cherry tomatoes and basil on a skewer, with a breadstick and a few crackers. Drain wet items on paper towels first so the cup stays dry.
8. Sweet cup for dessert
Caramel dip in the bottom, apple slices, a shortbread cookie, a square of dark chocolate, caramel corn and pecan halves. Serve it with coffee after dinner.
The assembly-line method for a crowd
Making 20 or more cups goes much faster if you work like a production line rather than finishing one cup at a time.
- Prep every ingredient first. Cube the cheese, fold the meat, cut the fruit and drain anything wet. Put each item in its own bowl.
- Build the skewers in one batch. Thread every skewer before you touch a cup, then lay them on a tray.
- Line up the cups on a sheet pan or in a muffin tin so they can't tip over.
- Add one layer at a time across every cup. All the bases, then all the tall items, then all the skewers, then the fillers.
- Check and fill gaps at the end, and add the garnish.
A muffin tin is especially useful: cups sit snugly in the wells and the whole tray moves to the fridge in one go.
Make-ahead timing
- The day before: buy everything, wash the produce and cube the firm cheeses. Store them separately in the fridge.
- The morning of: fold the meats, thread the skewers and refrigerate them covered.
- Up to a few hours ahead: assemble the cups without crackers or bread, cover the tray tightly and refrigerate.
- Just before serving: add the crackers, breadsticks and any honey drizzle so nothing goes soft.
Cut apples and pears as late as you can, and toss them in a little lemon juice mixed with water to slow browning.
Keep them safe on a long afternoon
Charcuterie cups contain cheese and meat, so they're perishable. The USDA Food Safety and Inspection Service advises not leaving perishable food out of refrigeration for more than 2 hours, or more than 1 hour above 90 °F, and keeping cold food at or below 40 °F.
- Serve in batches. Put out a tray of cups and keep the rest in the fridge.
- Nest the serving tray in ice (the USDA suggests keeping cold food on ice) if the cups will sit out for a while.
- Don't refrigerate and re-serve cups that have been out past the time limit.
- Transporting to a potluck? Pack the cups upright in a lidded container or a muffin tin covered with foil, and carry them in a cooler with ice packs.
Kids' charcuterie cups
Kids love having their own cup, but young children need a slightly different filling. HealthyChildren.org, from the American Academy of Pediatrics, lists whole grapes, nuts, chunks of cheese, meat sticks and popcorn among choking hazards for young children, and recommends cutting round foods like grapes into small pieces.
For little guests:
- Skip the skewers. Sharp picks aren't worth the risk at a kids' table.
- Quarter grapes lengthwise and cut cheese into thin slices or small pieces.
- Leave out nuts and popcorn for the youngest children.
- Good fillers: thin cheese slices, small crackers, soft fruit like banana slices or clementine segments, and a spoonful of hummus or yogurt dip.
Older kids can help assemble the cups, which keeps them busy in the hour before dinner. For seating, decor and activities, see our Thanksgiving kids table ideas.
Labeling for allergies and diets
If you're making several kinds of cups, use a small tag or a different color cup for each type, such as vegetarian, contains nuts and gluten-free. Write the main ingredients on a card by the tray so guests don't have to ask. Keep nut-containing cups on a separate tray from nut-free ones.
Serving ideas
- On a tiered stand near the door, so guests can grab one as they arrive.
- On a tray at each end of the room to spread the crowd.
- Beside the drinks, so one hand holds a cup and the other a glass.
For more on timing the whole day, our Thanksgiving hosting checklist has a make-ahead schedule that fits the cups in the hour before dinner. To set the scene, see our Friendsgiving decor ideas, and for something to do while people snack, try a few Friendsgiving games for adults.
Frequently asked questions
What do you put in charcuterie cups?
A base such as dip or nuts, a tall item like a breadstick, a skewer with cheese, folded meat and fruit, plus crackers and a garnish. Five to seven items per cup is plenty.
How far ahead can I make charcuterie cups?
You can assemble them a few hours ahead without the crackers and keep them covered in the fridge. Add crackers and breadsticks just before serving so they stay crisp.
What size cup works for charcuterie cups?
Clear 9 to 12 oz cups suit adult portions with a skewer and breadstick standing up. Smaller paper cups work well for kids.
How do you keep charcuterie cups from getting soggy?
Drain olives and other wet items well, put any dip in the bottom, and add crackers and bread at the last minute.
Can charcuterie cups sit out?
Only for a limited time. The USDA advises keeping perishable food out of the fridge for no more than 2 hours, or 1 hour above 90 °F, so serve them in batches.
About the author: This article was researched and written by The Party Ideas Hub Editorial Team. We put together practical, budget-friendly party ideas for ordinary homes, and we follow USDA food-safety guidance for anything served at room temperature. We say clearly when we haven't tried a product ourselves.
Read next: Thanksgiving Hosting Checklist and Make-Ahead Timeline →